WEEK TWO: 12-Week 72-Hour Kit Challenge
Hey, hey! It’s time to start working on week two of the 12-week 72-Hour Kit Challenge!
You will find the information about the week one tasks and a free printable HERE.
You can get the WEEK TWO free printable HERE!
I know you are so excited to be working on this project! J/K, I know spending money on emergency preparedness isn’t fun. We can all think of a hundred things we would prefer to spend money on. But we are seeking peace and safety here, and you can’t put a price tag on that!
If you are new here or have just now heard about my 12-week 72-Hour Kit Challenge, you can read more about the tasks and instructions for week one HERE.
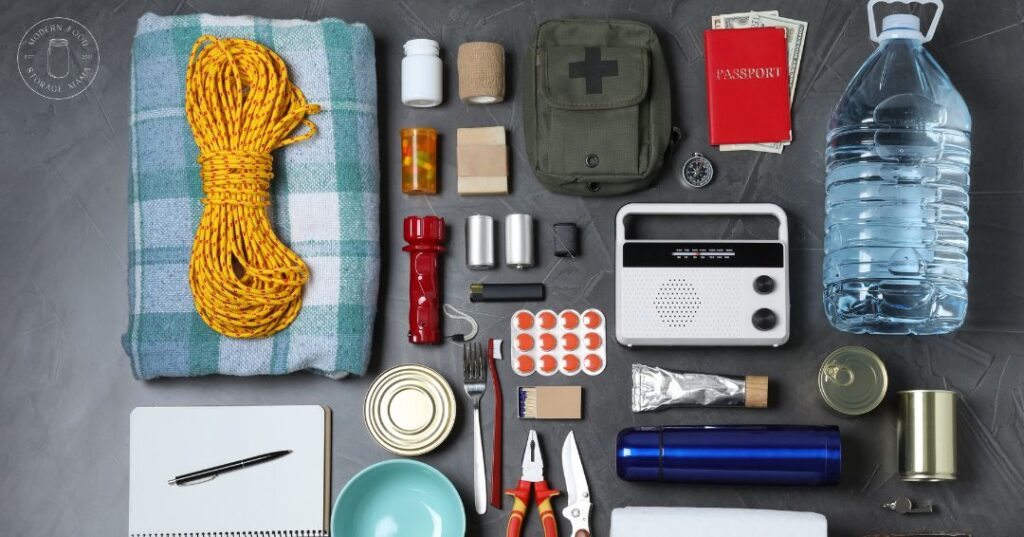
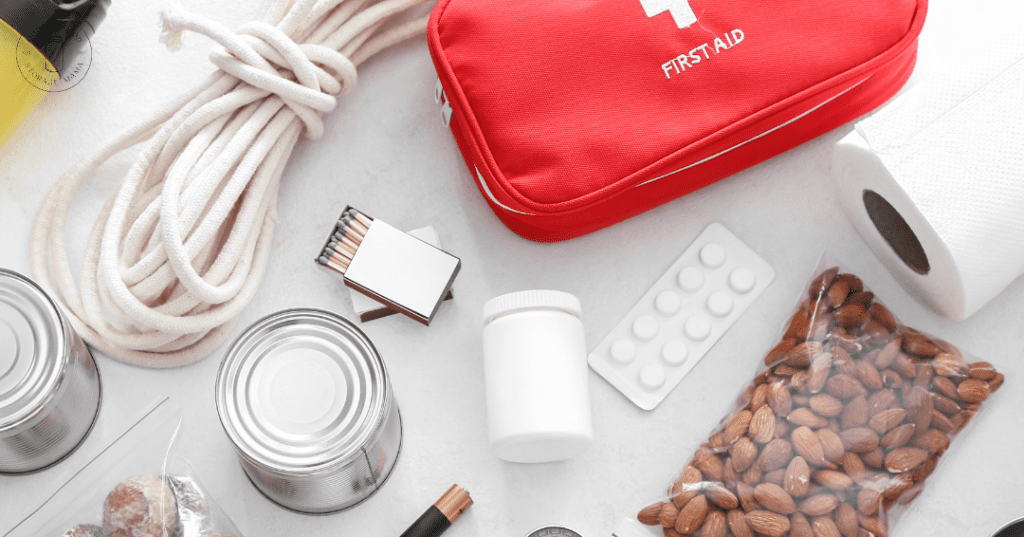
Also, if you still need a copy of my Free 72-hour Kit Guide, sign up through THIS LINK! I have printable checklists in this guide for items to pack in your emergency kits, instructions, and more.
When you sign up for my free guides, I will send you my Free Food Storage Guide first, but stay tuned because I will also send you my new Free 72-Hour Kit Guide. If you, for some reason, don’t receive an email or either of these guides, email me at brittany@modernfoodstoragemama.com
Now let’s chat about our week two goals-
For week one, we focused on searching our homes for items that could be used in the kits. For each week of this challenge, I have suggested you spend up to $25 on your 72-Hour Kit supplies.
We didn’t spend any money last week. Instead, we saved $25 to put towards this week’s purchases.
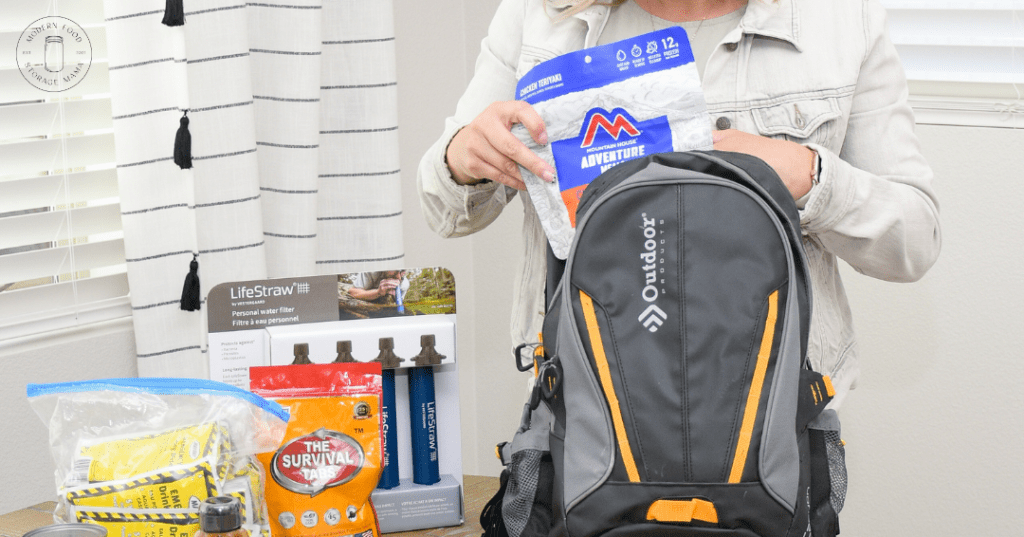
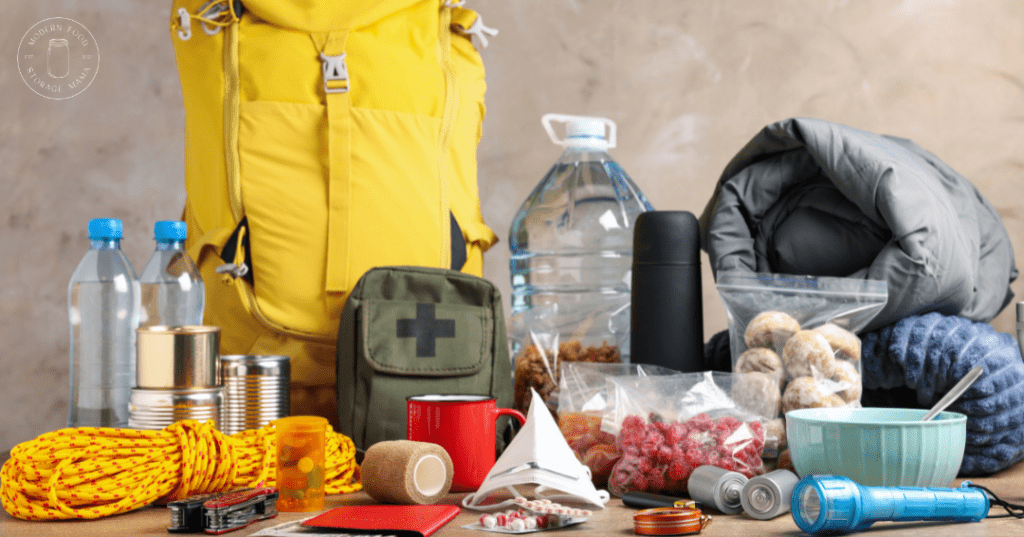
For week two of this challenge, I would like you to find or buy bags within a $50 budget. You could ask family or friends if they have any old bags that might work, or you could check Facebook marketplace or a thrift store.
You want to find sturdy bags that can easily be carried on your back. You don’t have to use a backpack; an old duffle bag could work. But keep in mind you want these bags to be easy to carry.
For my family, we have a variety of bag sizes. My younger kids have regular-sized backpacks (think big school backpacks). My oldest daughter and I have more oversized backpacks that are more geared for hiking. And my husband has an actual hiking backpack. My husband’s 72-Hour Kit is the largest and has the most supplies. I bought all our backpacks from Walmart’s camping section many years ago. My husband bought his hiking backpack from a friend.
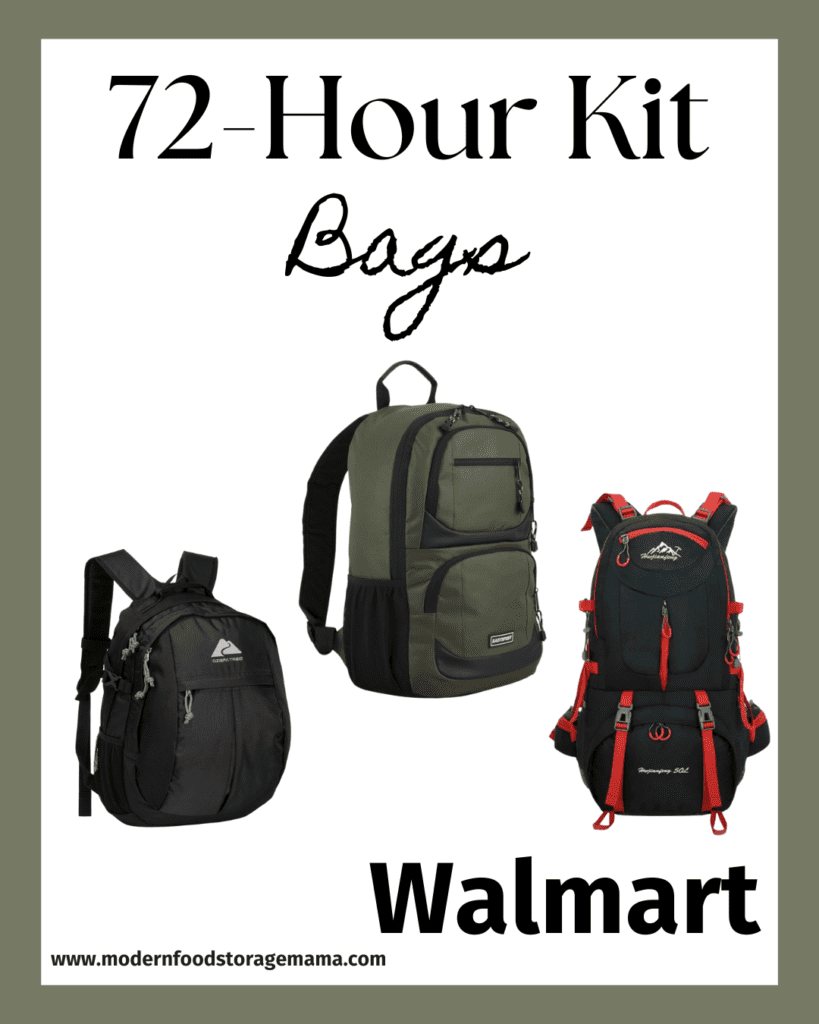
I have rounded up some bag ideas for you! The bags I have choosen range from $10 to $30. When choosing a bag, keep in mind who the bag is going to be used for and what size of bag you want for that person! Some of the $10 options I have included are on the smaller side, but those bags could work great for a child’s kit!
Here are some bags you can check out from WALMART to use for your kits!
The goal for this 12-week challenge is to assemble two complete adult kits. Still, it doesn’t hurt to start collecting items to make additional kits if your family has more than two people. So be on the lookout in your home for supplies to assemble kits for your children or other family members living with you.
If you didn’t complete the week one tasks, that’s ok! You can keep looking for those items this week. I want you to put your new bags (or new to you) and the items from week one of the challenge in the box that you found and marked “72-Hour Kits” on.
If you are wondering what the heck the box is all about, go back and re-read the instructions from week one.
The point of the box is to keep filling it up with supplies and to put it somewhere you will see it often. We want the box to be an eyesore. We want to remember this challenge and our goals. So, yes, I want you to stick an ugly box that you will fill with emergency supplies somewhere you will see daily!
ALL we will focus on for week two is buying/finding bags for our kits. We will also continue to search for items from our week one list to add to our kits. Reminder, do not spend money on the items from week one; the point of that task is to find as many items as you can that you already own to use in your kits.
Easy peasy, right?
Week one and two should be pretty easy!
I know you are busy, though- I am, too- and it’s easy to forget to do these tasks. Make sure you follow along on Instagram and/or Facebook so I can keep reminding you to get to work on this project.
I am going to be your NAG!! I know it’s annoying, but that’s also why you are here, right? We all need some pressure and reminders to keep working on our emergency preparedness goals.
It’s time to do things we don’t necessarily want but need to do!
Let’s put together our 72-hour Emergency Kits; this challenge is designed to help you do that in a timely but realistic way while also sticking to a budget!
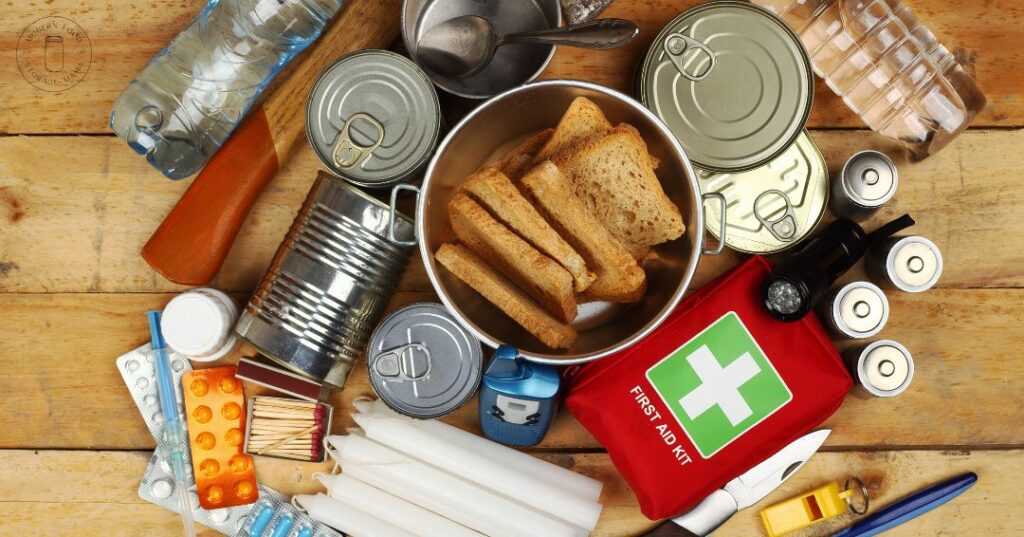
Why do you need 72-Hour Kits?
Preparing a 72-hour emergency kit, a bug-out bag, a go-bag, or an evacuation bag is crucial for ensuring you and your loved ones are ready for unforeseen circumstances.
These kits contain essential items to sustain you for at least three days in emergencies such as natural disasters, power outages, or evacuations.
Having a well-equipped 72-hour kit can provide you with a sense of security and preparedness during challenging times. Here are some reasons why everyone should have a 72-hour kit and what types of emergencies they can help you navigate through:
- Immediate Access to Necessities: In an emergency, having a pre-packed kit ready to go can save precious time and ensure you have essential supplies readily available.
- Self-Sufficiency: A 72-hour kit empowers you to be self-sufficient during emergencies when access to basic necessities may be limited.
- Peace of Mind: Knowing you have a well-prepared emergency kit can alleviate stress and anxiety during uncertain situations.
- Mobility and Readiness: Bug-out bags are designed to be portable, allowing you to quickly evacuate if needed without worrying about gathering supplies.
- Versatility: These kits can be customized to suit your specific needs and emergencies common in your region.
Preparing for unexpected situations such as natural disasters and emergencies is always wise. A 72-hour emergency kit readily available is a proactive way of ensuring your safety and well-being during such times. It’s essential to regularly review and update your kit to guarantee that all supplies are in good condition and aligned with your current needs. Stay prepared and stay safe!